Nissan LEAF CRC of CAN messages
and a code that runs on Arduino
So after Daniel posted a video on Youtube explaining where exactly to look for LEAF battery ID and how it works, I decided to try and make CAN-man-in-the-middle solution for my own LEAF, which will need a battery swapping soon. Yes, there are plenty of such solutions already on the market, but they all are quite expensive, and I enjoy learning new things. So why not? Link to Daniel's video and other sources of useful information you will find bellow in this page.
So basically CAN-man-in-the-middle project involves two CAN modules/drivers and a microcontroller. Microcontroller must be able to identify correct CAN message, stop it from going out, do a needed modifications and send it modified. For a battery swap we need to catch 1dc message and modify battery ID and couple other things. One of these things is CRC (cyclic redundancy check). In this page I will give you example of Arduino code with which you can get correct Nissan CRC generated. It works with the following CAN messages: 11a, 1d4, 1da, 1db, 1dc, 55b.
This code, if uploaded to any Arduino board, will return CRC on serial communication port. Message must be put in to code before uploading it to Arduino board. Such code has no practical use on its own, but can be easily implemented into any other project which requires getting the right CRC.
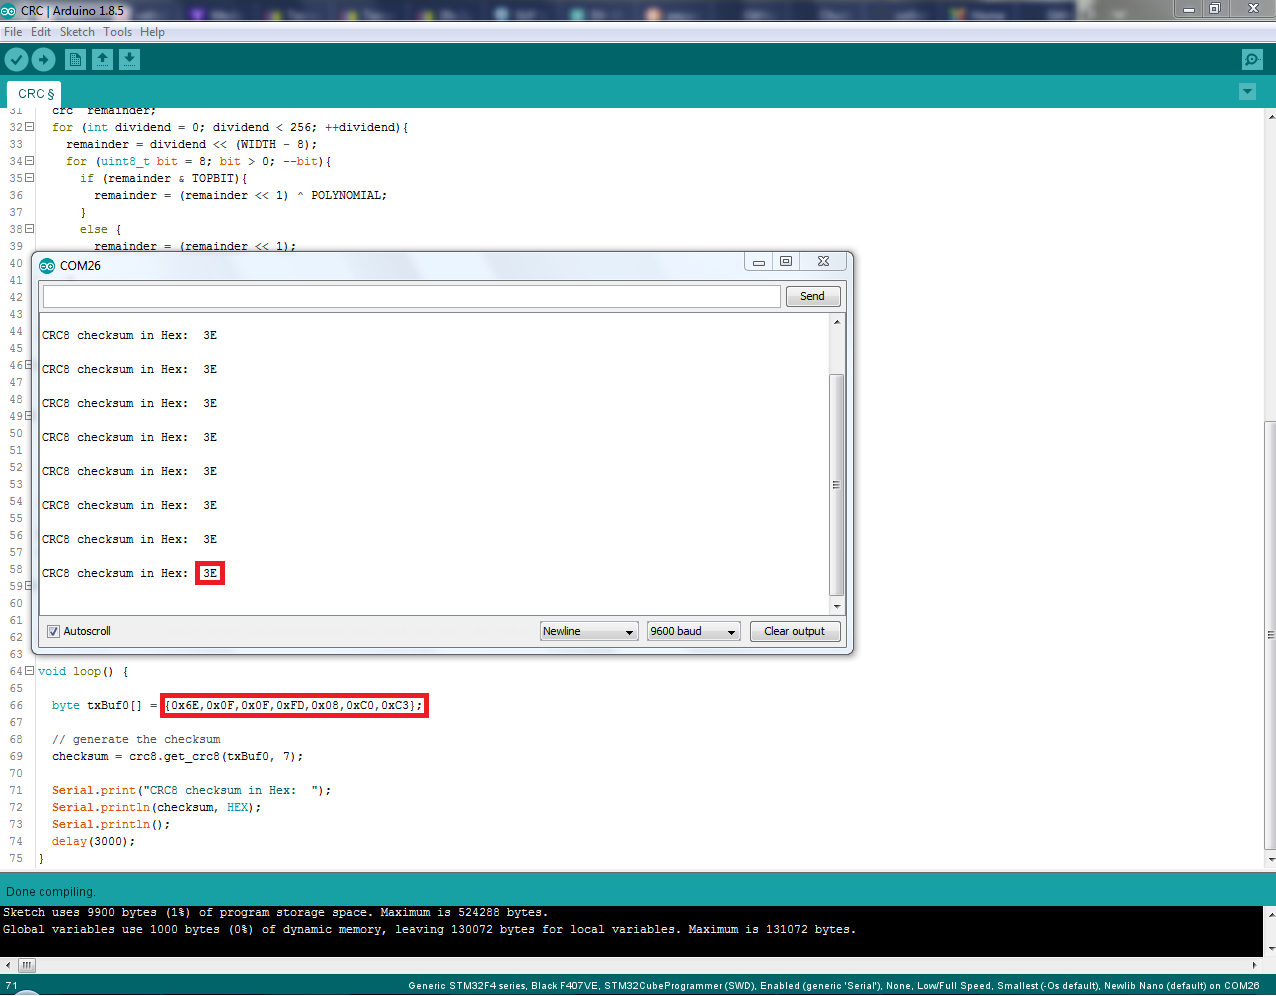
See the picture bellow of what it does when uploaded to Arduino board:
This code is not written by me. I found it on Github. That's a standard code for a standard CRC8 checksum generation. I only changed some bits to make it usable for Nissan LEAF CAN messages. Link to original source you will find bellow.
Copy this complete code to your Arduino IDE and it must work with all standard Arduino boards without needing of any additional libraries:
#ifndef CRC8_H
#define CRC8_H
#if ARDUINO >= 100
#include "Arduino.h"
#else
#include "WProgram.h"
#endif
typedef uint8_t crc;
#define POLYNOMIAL 0x85 // <- must be 0x85 For Nissan LEAF
#define WIDTH (8 * sizeof(crc))
#define TOPBIT (1 << (WIDTH - 1))
class CRC8 {
public:
CRC8();
void begin();
crc get_crc8(uint8_t const message[], int nBytes);
private:
uint8_t crcTable[256];
};
#endif
CRC8::CRC8(void) {
}
void CRC8::begin(void) {
crc remainder;
for (int dividend = 0; dividend < 256; ++dividend) {
remainder = dividend << (WIDTH - 8);
for (uint8_t bit = 8; bit > 0; --bit) {
if (remainder & TOPBIT) {
remainder = (remainder << 1) ^ POLYNOMIAL;
}
else {
remainder = (remainder << 1);
}
}
crcTable[dividend] = remainder;
}
}
crc CRC8::get_crc8(uint8_t const message[], int nBytes) {
uint8_t data;
crc remainder = 0;
for (int byte = 0; byte < nBytes; ++byte) {
data = message[byte] ^ (remainder >> (WIDTH - 8));
remainder = crcTable[data] ^ (remainder << 8);
}
return (remainder);
}
CRC8 crc8;
uint8_t checksum;
void setup() {
Serial.begin(9600);
crc8.begin();
}
void loop() {
byte txBuf0[] = {0x6E,0x0F,0x0F,0xFD,0x08,0xC0,0xC3}; //<- change to your message values minus CRC byte
checksum = crc8.get_crc8(txBuf0, 7); // generates the checksum
Serial.print("CRC8 checksum in Hex: "); // displays checksum on serial port
Serial.println(checksum, HEX); // displays checksum on serial port
Serial.println();
delay(3000);
}
Or you can download it in ino format:

|
CRC.rar Size : 0.851 Kb Type : rar |
I hope this information will be useful to someone. For me this is second step in to making man-in-the-middle device for my LEAF. First step was to build CAN bridge, which was successfully done and I might share some info with others soon on this website.
Bellow is the list of useful links which helped me with understanding CRC and finding the correct way to generate it in Arduino:
"My Nissan Leaf" forum posts with info about Nissan CRC
Daniel's video "Nissan Leaf - Battery ID Secrets Exposed" on Youtube
Github link to Arduino CRC8 code generator used in this project
I have also found that someone already shared all the information and a code before. But I found it bit too late, and had no time or need to check if it's working. But it might be useful for someone else, so I decided to include it here also:
Controlling the gen2 Nissan Leaf inverter
© Copyright EV-OLUTION